
Create Email Nudge
In Nudge, users can send three types of Email Nudges: One-time Nudge, Recurring Nudge and Real-time Nudge.
One-time Nudge: Users can create one-time nudge to send immediately or can schedule it for future date or time.
Recurring Nudge: Users can create recurring nudges to send periodically.
Real-time Nudge: Users can create Real-time Nudges to send action based nudges like Authentication, payment confirmations and more real-time messages.
One-time Nudge
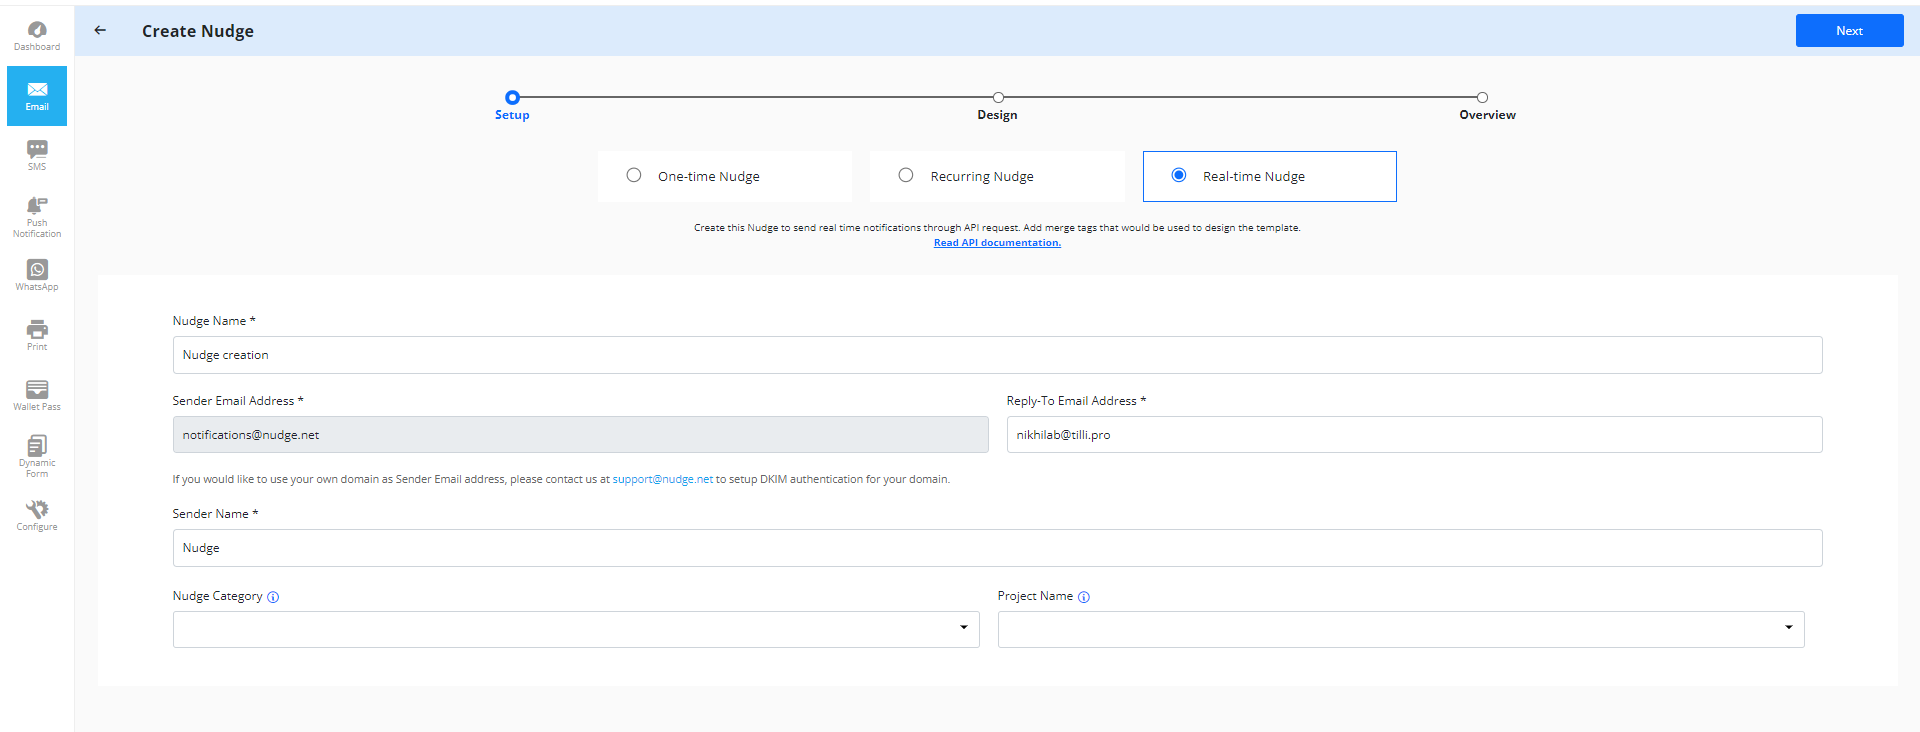
Step-1: Setup the Nudge
To create an Email nudge, the user need to select the type of nudge and then provide the basic details about the nudge like the nudge name, nudge description, Sender email address, reply-to email and sender name) to create a new nudge.
Fill the input fields Nudge name, Sender "Email Address", "Reply to Email Address", "Sender name", "nudge category" and "project name".
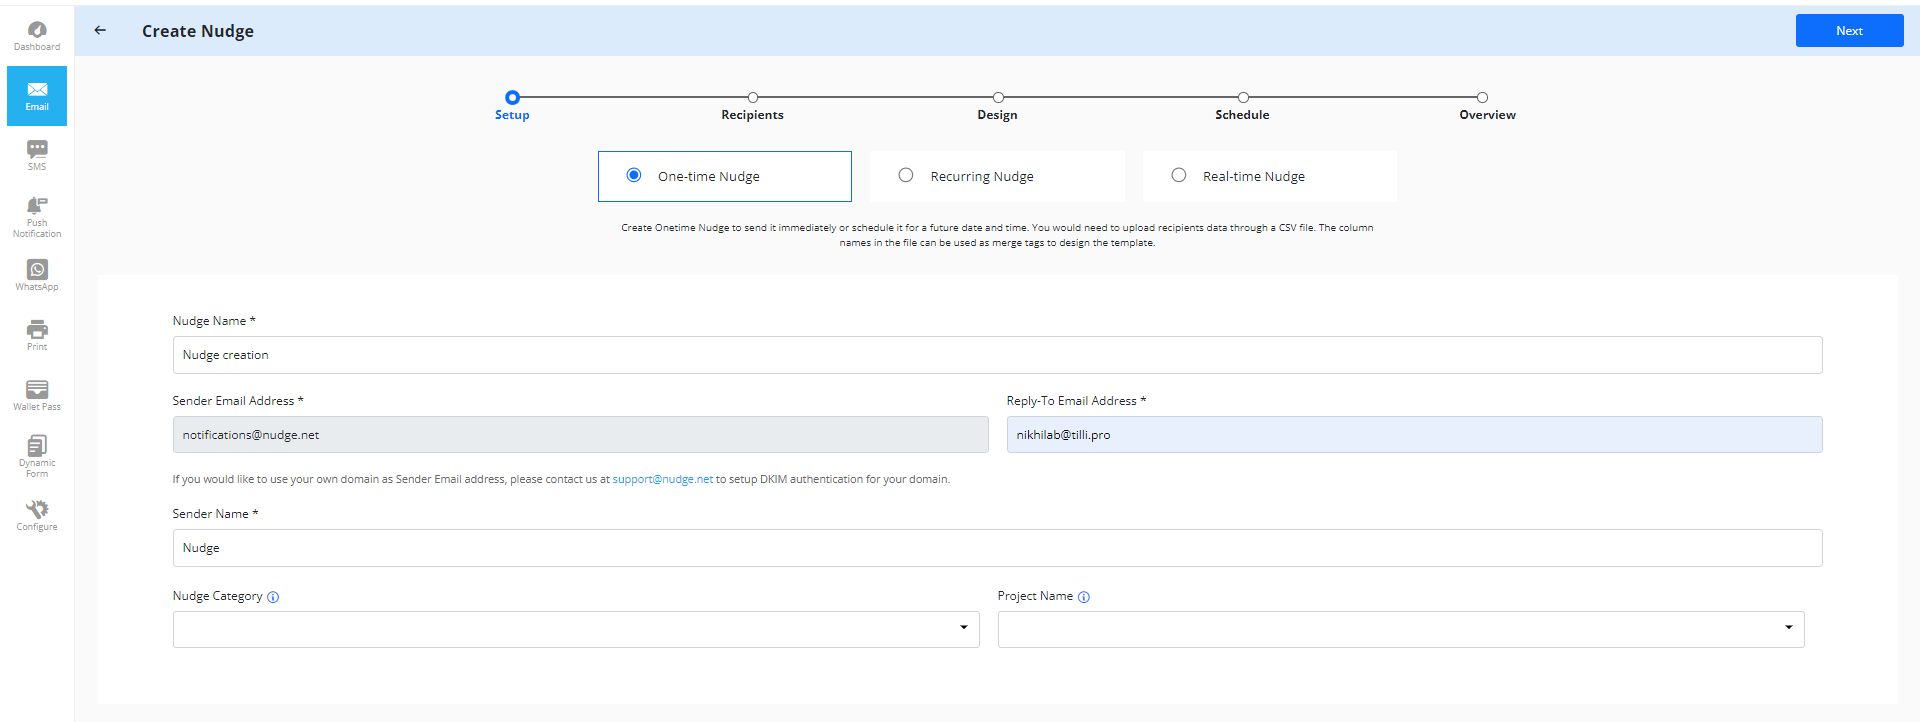
Nudge category and project name are optional fields.
Note: The Sender email address will be shown as notification@nudge.net which will be non-editable for all the users. Users can customize it by contacting us at support@nudge.pro
Step-02: Add the Recipients
The system shall ask the users to provide the recipients file which is also known as contact data file, Which needs to be in CSV format only. Users can import new contact data file or use their existing files in the nudge.(Which users have previously imported)
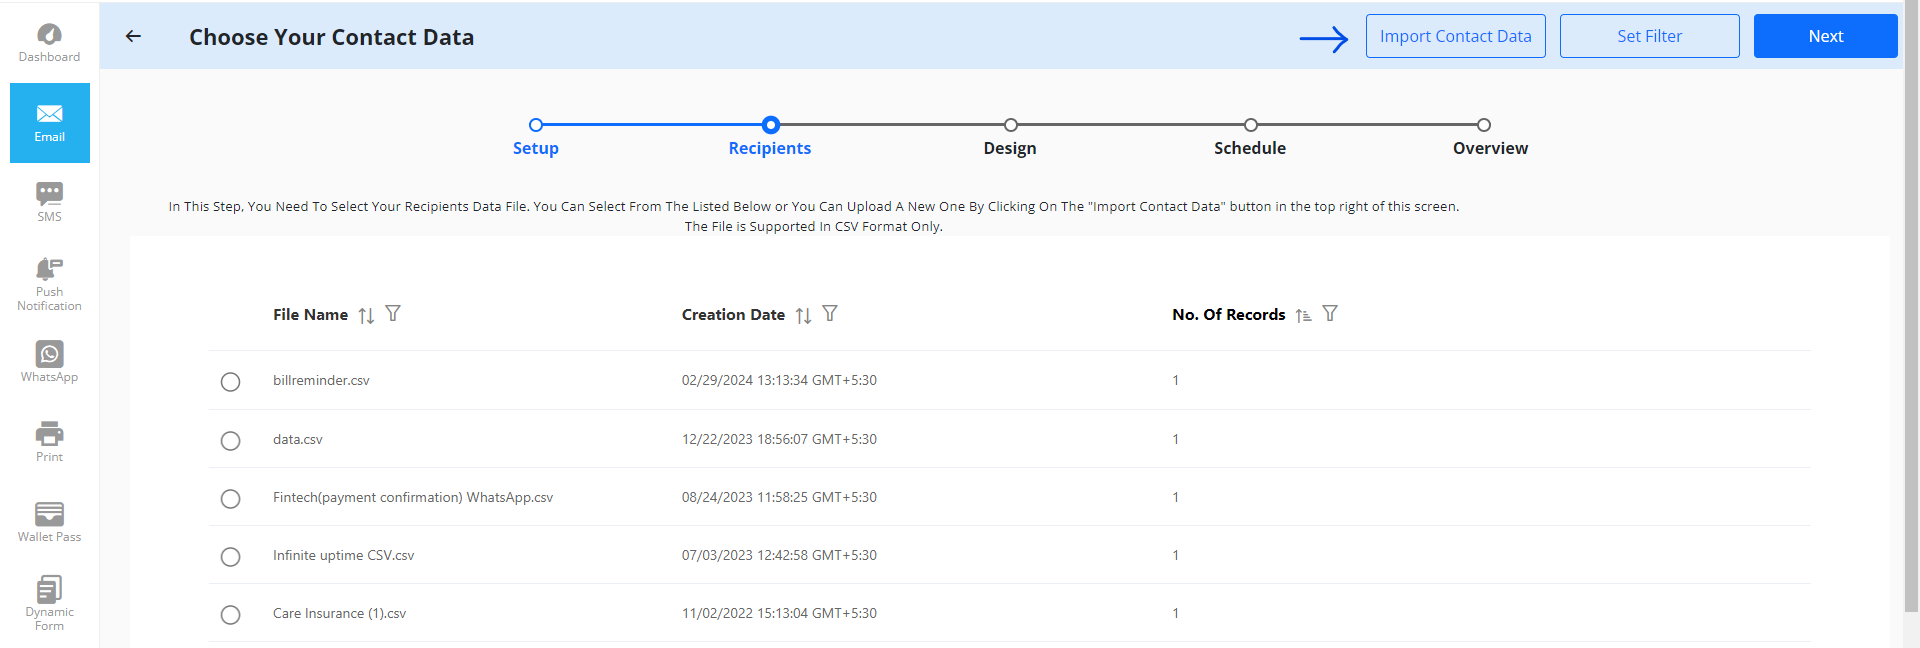
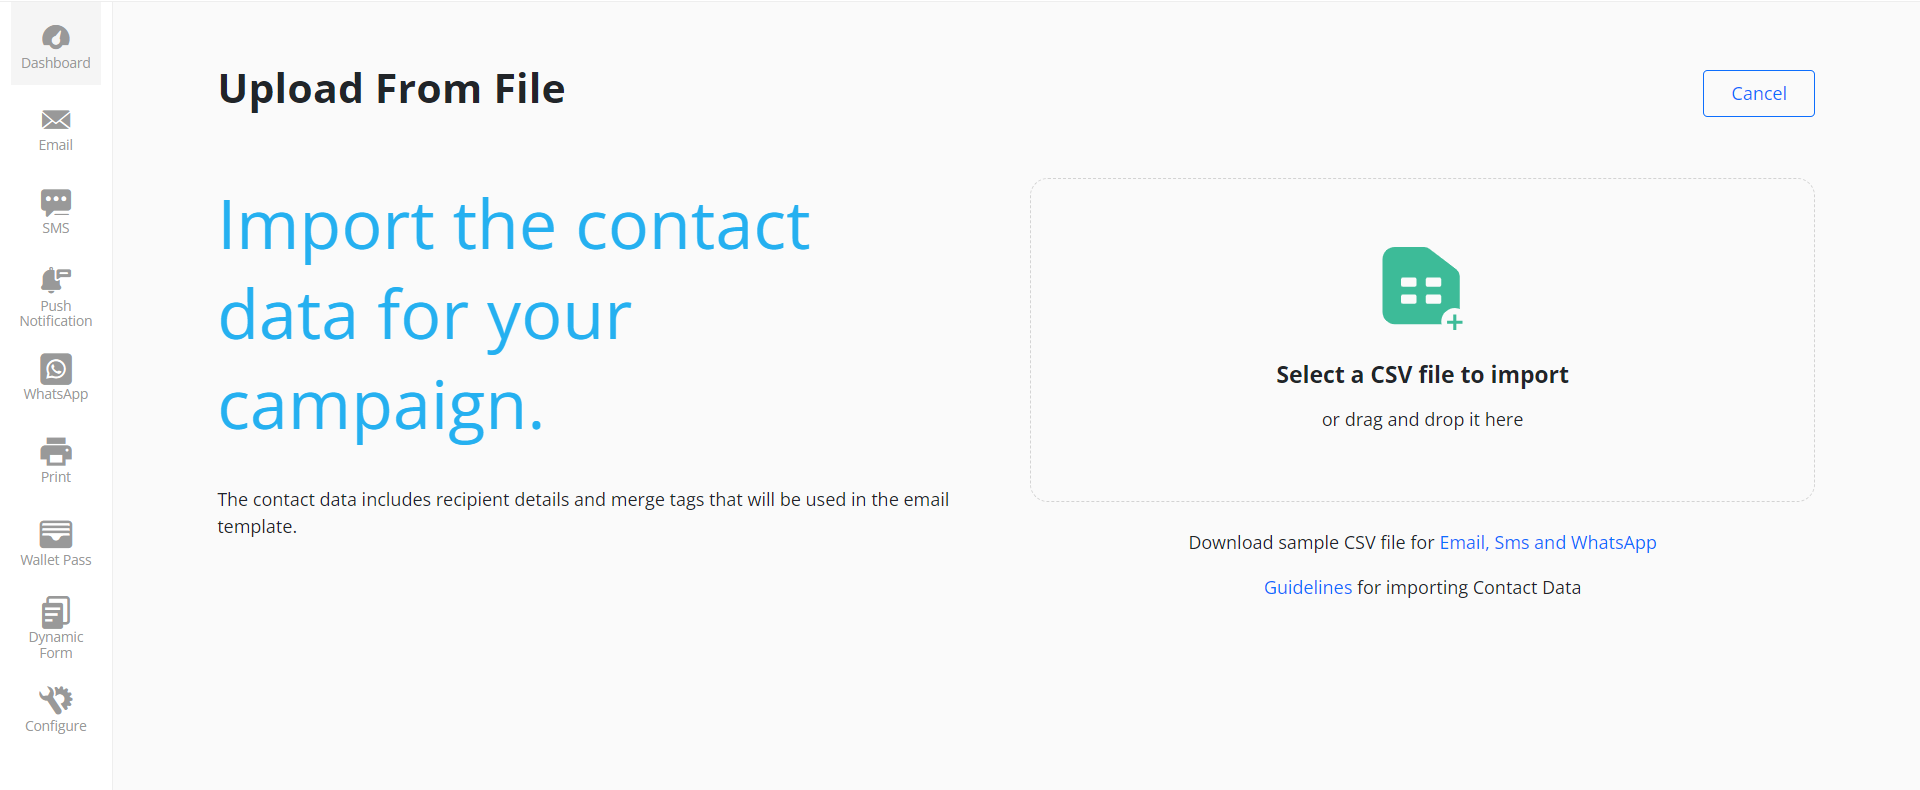
The users can import new contact data files from their local computer system. For importing the new data file, the user need to click on the “Import contact data” button in the right-top corner.
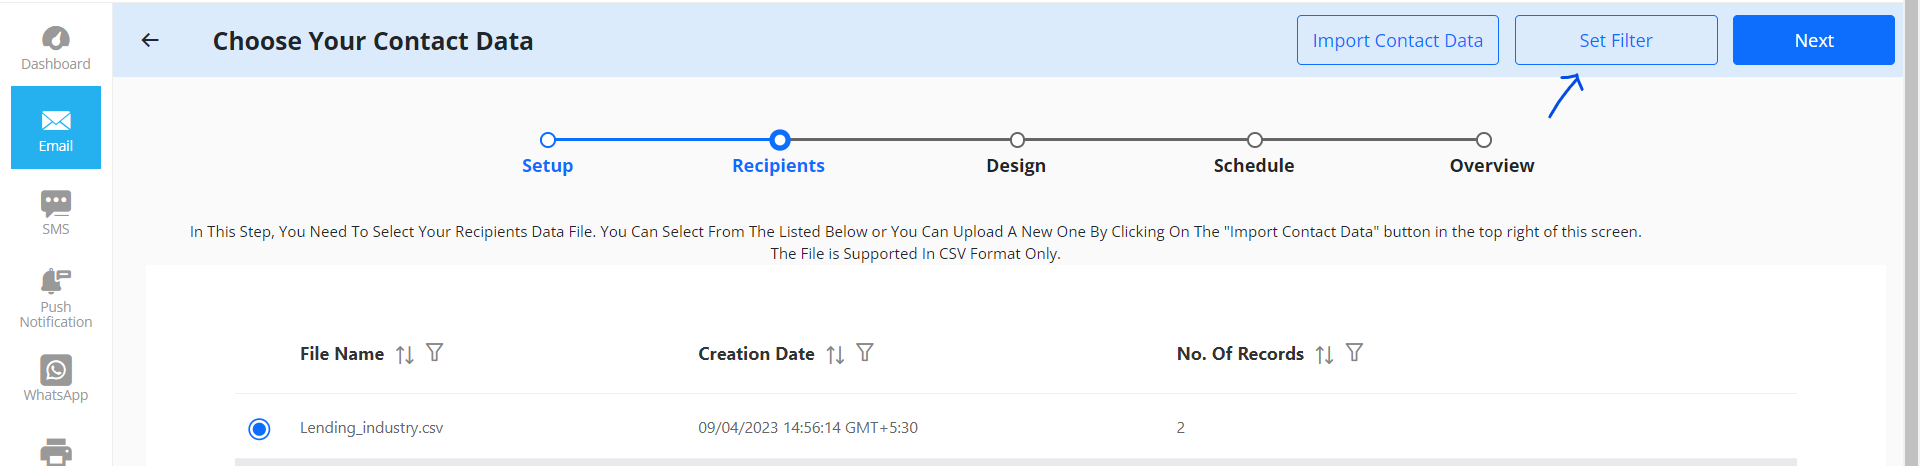
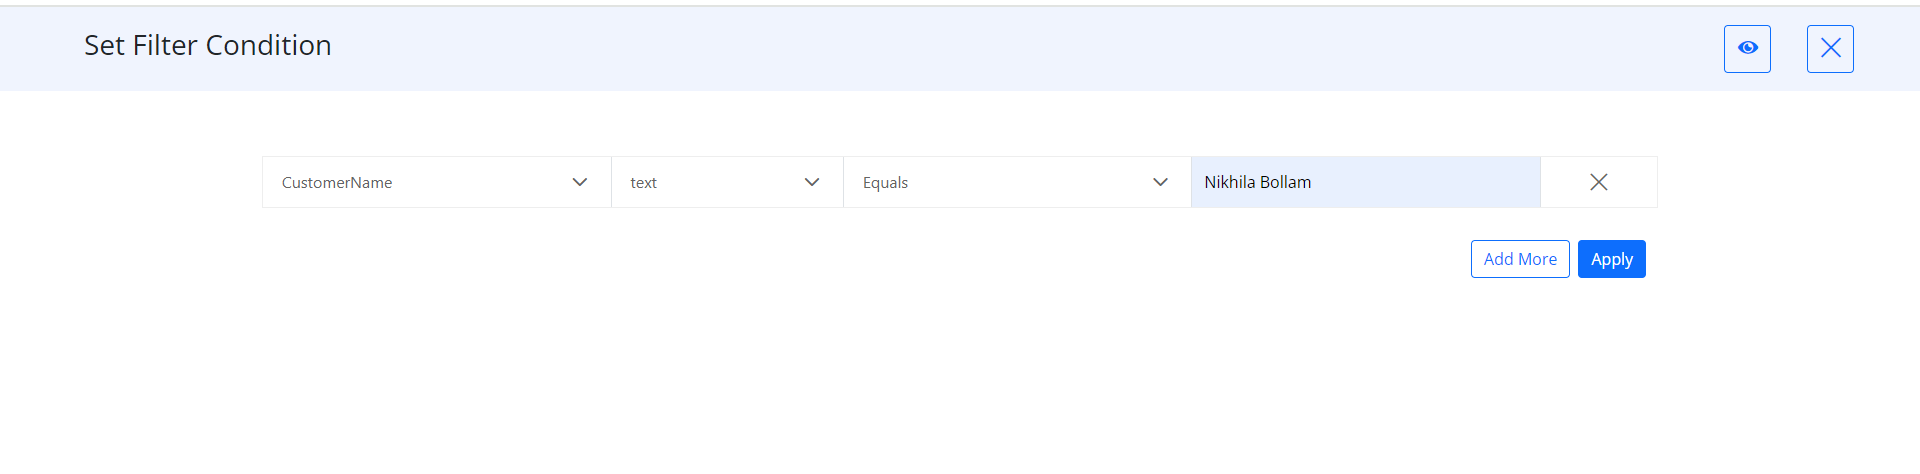
In Nudge, users can selectively target recipients from a comprehensive list by customizing filter settings, and adding "And / Or conditions" thereby refining the scope of their communication.
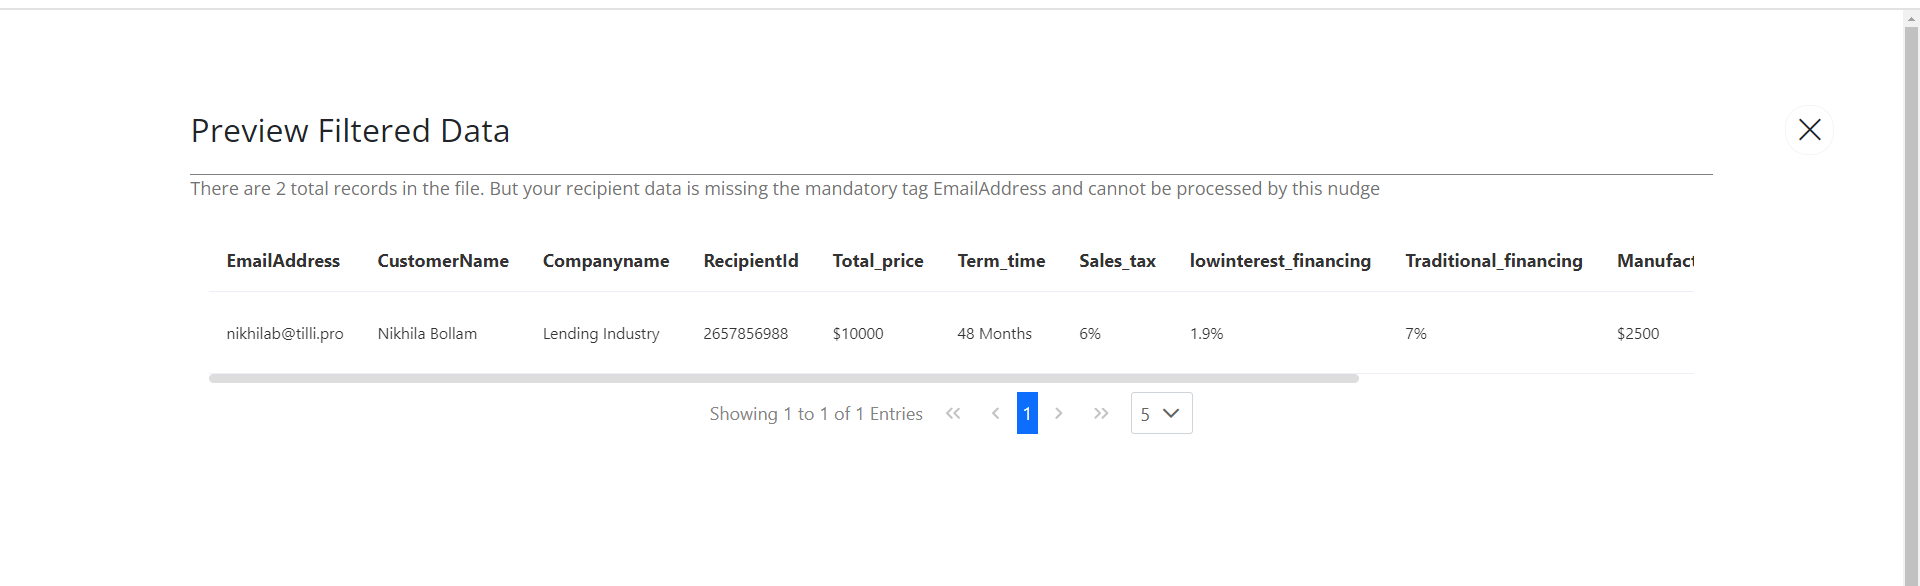
Users have the capability to enhance targeting precision by incorporating "And" / "Or" conditions through the utilization of merge tags, data type selection, condition specification, and value input. Users can iteratively add multiple conditions, and subsequently apply these refined filters to streamline their recipient selection process. Before proceeding, users can review a preview of the filtered contacts to ensure accuracy before sending.
Import Contact Data
Users can also drag and drop the files from their system to import the contact data.
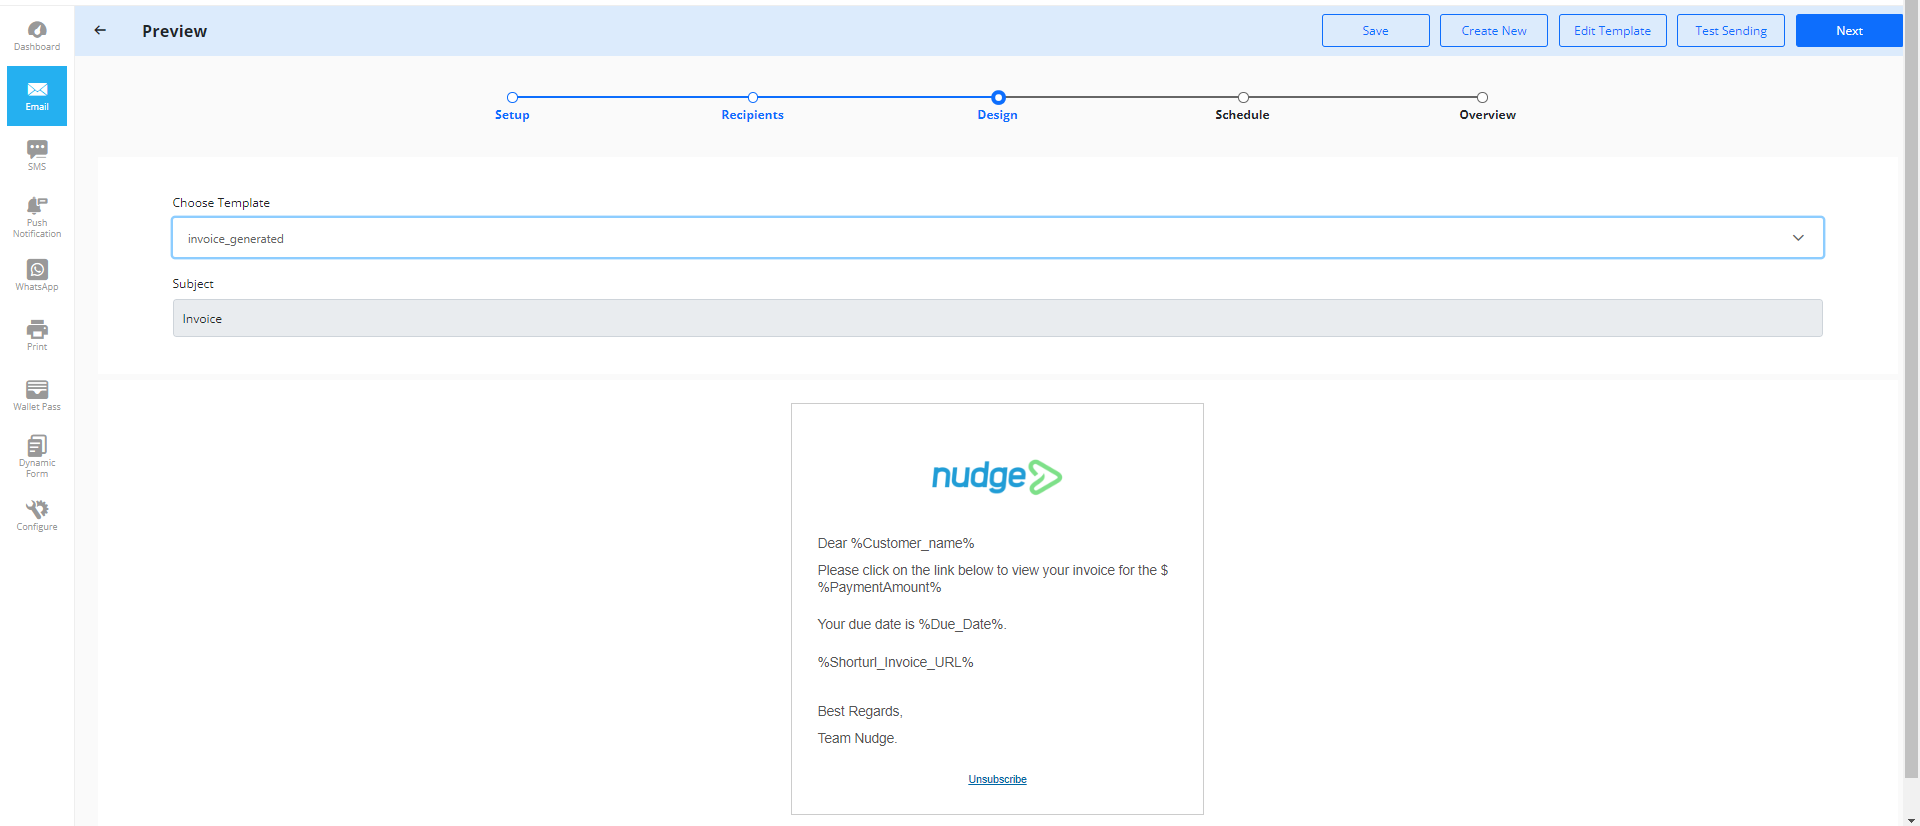
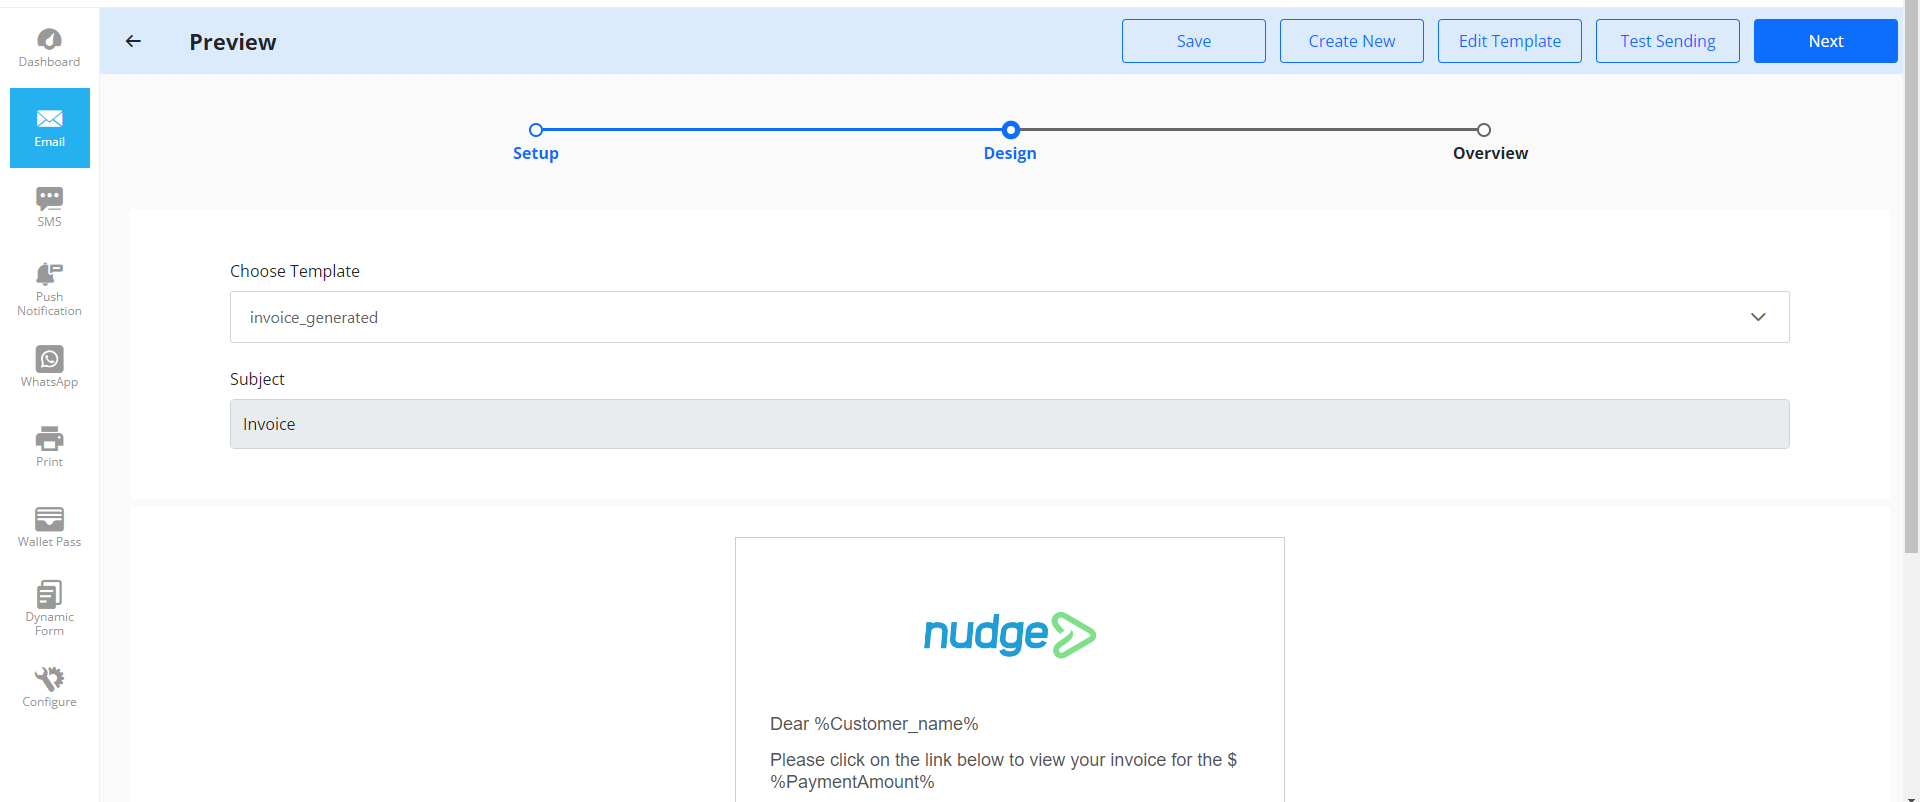
Step-03: Design the Nudge
The users can choose any of the predefined email templates. At this stage, users can modify or create the new template based on their requirements.
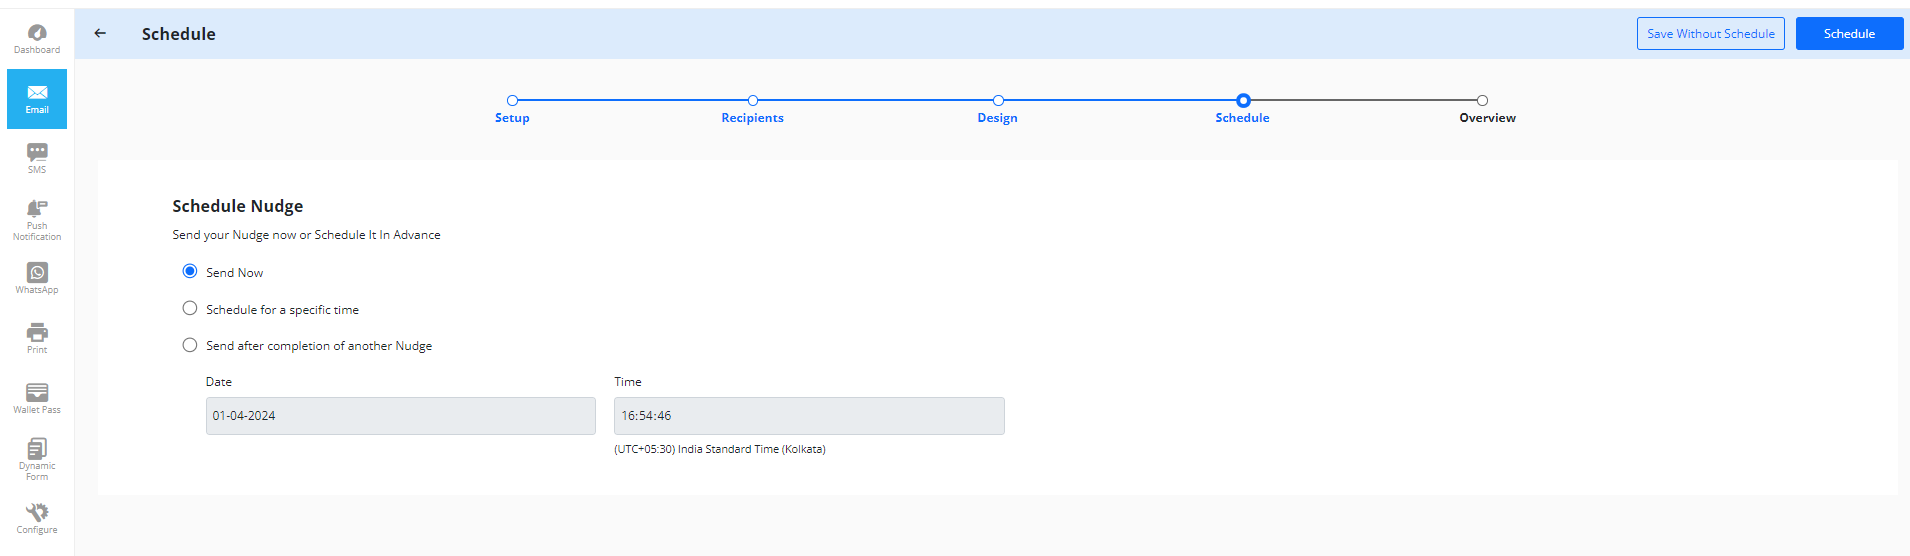
Step-04: Scheduling the Nudge
Nudges can be scheduled in three different ways:
- Users have the option to send a nudge immediately by selecting the "Send Now" button.
- Users can schedule the nudge for a specific date and time.
-
Users may also schedule a nudge to be sent following the schedule of another nudge, which could be through the same or a different channel.

1.6 Send after completion of another Nudge

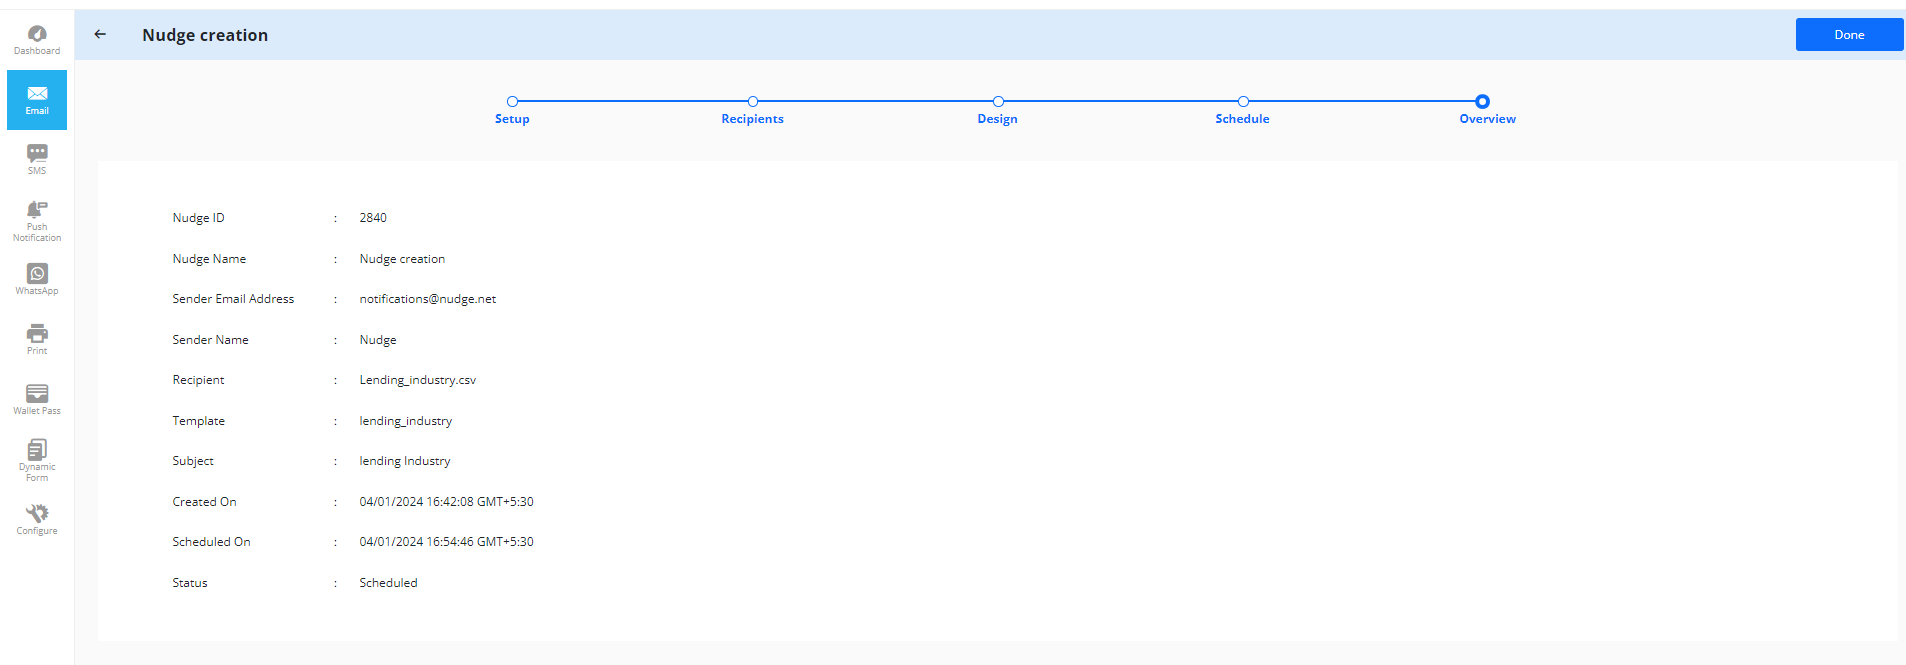
Step-05: Overview
Users can see the overview of the Nudge like Nudge ID, Nudge name, senders email address, recipient CSV name, template name, status and other details.
SCHEDULING OF RECURRING NUDGE
The only difference between One time Nudge and Recurring Nudge is that users can Send Recurring Nudge multiple times to the Customer based on the Schedule Time and Data of users convenience.
The users can select the time, start date, and start time for recurring nudges. The user can set the nudge ending date from the calendar. The system allows the users to save the recurring nudge without scheduling and the saved nudge will be listed in the existing nudge list. Refer the below image for other recurring nudge scheduling options.

SEND A RECURRING NUDGE TO DIFFERENT RECIPIENT
Users can now send one recurring nudge to different recipients in every recursive sent. To send a recurring nudge to different recipients users need to create a recurring nudge in the regular steps.
After creating a recurring nudge, users can provide the new CSV file before every batch runs of the recursive nudge. For this purpose, users need to use a recurring nudge API. The following steps must be taken to successfully send a recurring nudge to the different recipients every time.
Step-1: Create a Recurring Nudge
To send a recurring nudge to different recipients, users can utilize the nudge API.
Step-2: Pass Nudge ID to the API
Users need to pass the created recurring nudge ID to the recurring nudges API.
Users can explore Nudge API Documentation. To understand how to pass nudge id: Click Here
Step-3: Replace the Contact Data File
Before every nudge run or recurring nudge, users need to replace the contact data file(users can change those files via FTP server)which must have new data of recipients.
VIDEO TUTORIAL
Real-Time Nudge
Step-01: Setup the Nudge
To create an Email nudge, the user need to select the type of nudge and then provide the basic details about the nudge like the nudge name, nudge description, Sender email address, reply-to email and sender name) to create a new nudge.
Fill the input fields Nudge name, Sender "Email Address", "Reply to Email Address", "Sender name", "nudge category" and "project name".
Step-02: Select the design
The users can choose any of the predefined email templates. At this stage, users can modify or create the new template based on their requirements.
Step-03: Select the Template from the existing set of Templates or create a new one.

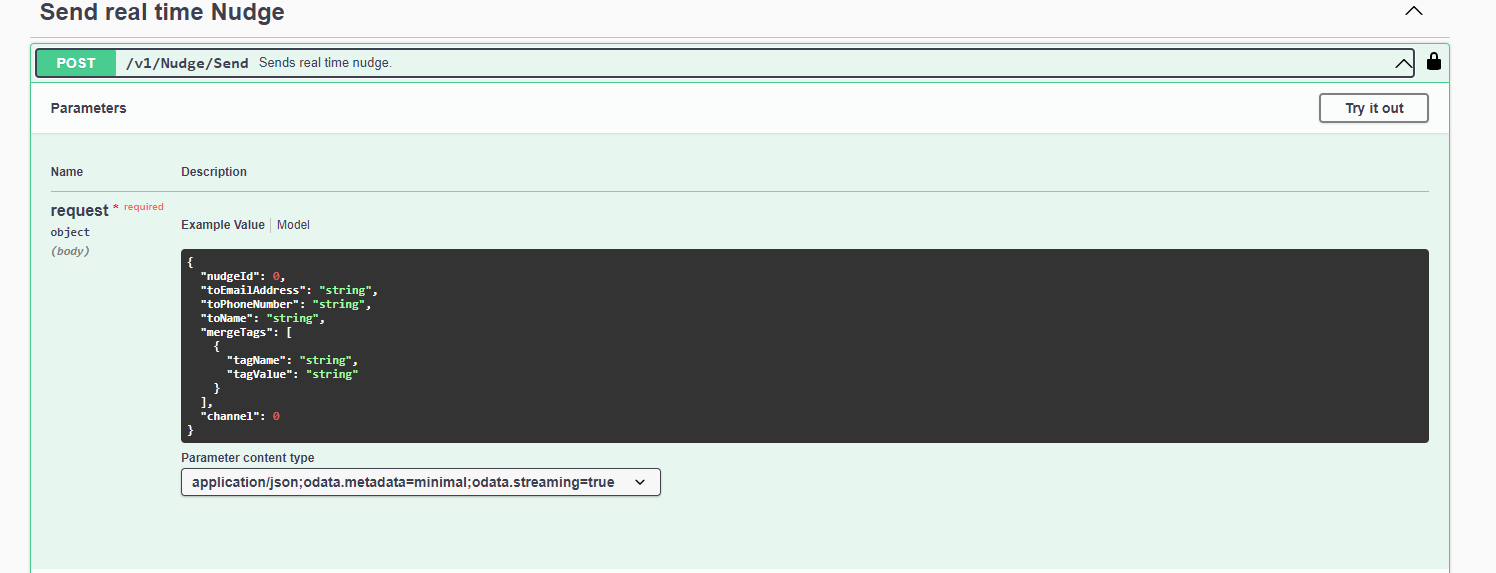
Note: Copy this Nudge ID in API request to send Real time nudge as shown in the above picture.


Step-04: Visit the Configuration page by selecting the icon or from the navigation displayed on the left side of the Nudge page.

Step-05: Click “Create new API Key” button and it will open Create API Key page.

Step-06: Click “Generate” button to generate the API Key. Copy the Key by clicking “Copy” option and click Done button.

Click on Read API Documentation.

Step-07: Click “Authorize” button and one pop up will be appeared on the screen.

Step-08: Enter the copied API key into “Value” field and select “Authorize” button.

Step-09: Click “close” to close the pop up.
Step-10: Under the Send/Launch Nudge section, select the option for sending real time nudge and click “Try it out” button.


